
Use one controller
Avoid duplicate controllers unless each module handles a clearly separate step.
Config tutorial
Good configs are controlled, consistent, and easy to understand. Start with the exact examples below, then change one setting at a time for your sensitivity, ping, and playstyle.
Start here
Most bad configs fail because too many modules try to control the same action.
Avoid duplicate controllers unless each module handles a clearly separate step.
Aim speed should fit your Minecraft sensitivity. Delays should fit your ping.
Test each adjustment alone so you know exactly what improved or broke the config.
Legit combat
Use these modules separately or with conservative timing. The screenshots show the Wocky baseline.
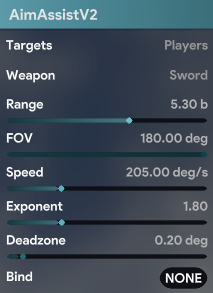
Use V2 for camera-visible, sensitivity-aware adjustment. It should support your own mouse movement, not replace it.
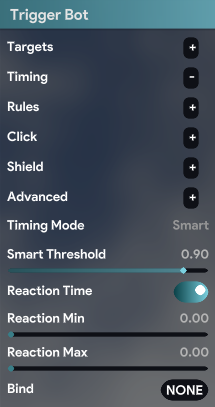
Smart timing is the clean baseline because it follows weapon cooldown instead of producing a fixed click rhythm.
Crystal combat
Build around one primary workflow. Auto Crystal and Auto Hit Crystal can work together when their timing and responsibilities do not conflict.
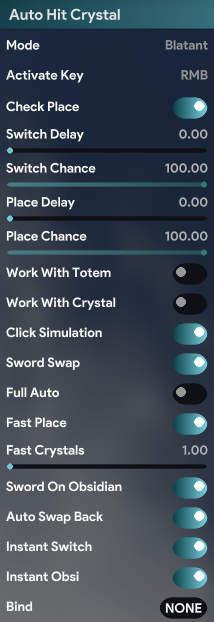
This is the most complete RMB workflow. Hold right mouse and let its internal switch, place, and swap logic own the action.
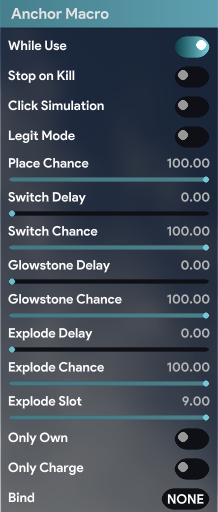
Use While Use for intentional activation. Zero-delay values are the shown baseline, but slower switching may be more reliable on high ping.
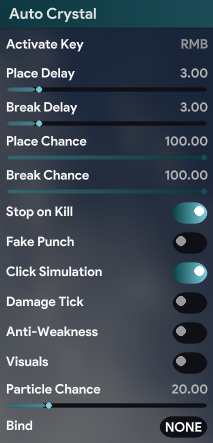
Use this for a smaller RMB place-and-break cycle, either alone or alongside Auto Hit Crystal when both workflows are timed correctly.
Survival
Defensive inventory automation should remain simple and should not fight your combat module for the selected slot.
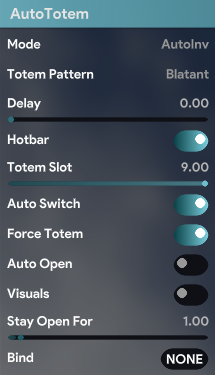
AutoInv with a fixed totem slot makes behavior easy to diagnose. Confirm that slot before enabling Auto Switch.
Before joining
Run through this list after every major change.